Pages

Showing posts with label technique. Show all posts

Sunday, September 26, 2010

Step-by-Step Watercolour Painting - Part 5

This is the last Part in the Step-by-Step Watercolour Painting Series.  You can see Part 1, Part 2, Part 3 and Part 4 by clicking on these links.

I started with a photo that I had taken a while ago.  I have been working on these plastic animals in bowls for sometime, and have quite a few reference photos.  This painting is 18cm x 18cm big, a bit bigger than the subject matter (the bowl is about 10cm in diameter.)

It has been quite some time since I have used watercolours, and in this work, I experimented with adding gum arabic to the paint to give it a gloss.  There is not much difference between these three stages, just a tweaking of the wash on the bowl, and cleaning up some of the details that got lost.

Figure 18


Figure 19


Kerry Daley, Settling In. Watercolour on Paper 18cm x 18cm © 2010

Overall, I am happy with the result.  If I had to paint this again though, I would definitely do the bowl first and the insects afterwards.  It was difficult to work on the bowl with the insects already painted, especially as I had used so much gum arabic, and the paint came off the paper very easily.


While trawling the net this week, I came across these great things:

I would like to thank Katherine Tyrell of Making a Mark and Darren Brant for visiting my blog and taking the time to leave a comment.


Sunday, September 12, 2010

Step-by-Step Watercolour Painting - Part 4

This is Part 4 of my watercolour painting. I have been photographing each stage to show the development of a watercolour painting step-by-step.  You can click on these links to see Part 1, Part 2, and Part 3

Figure 16

Figure 17
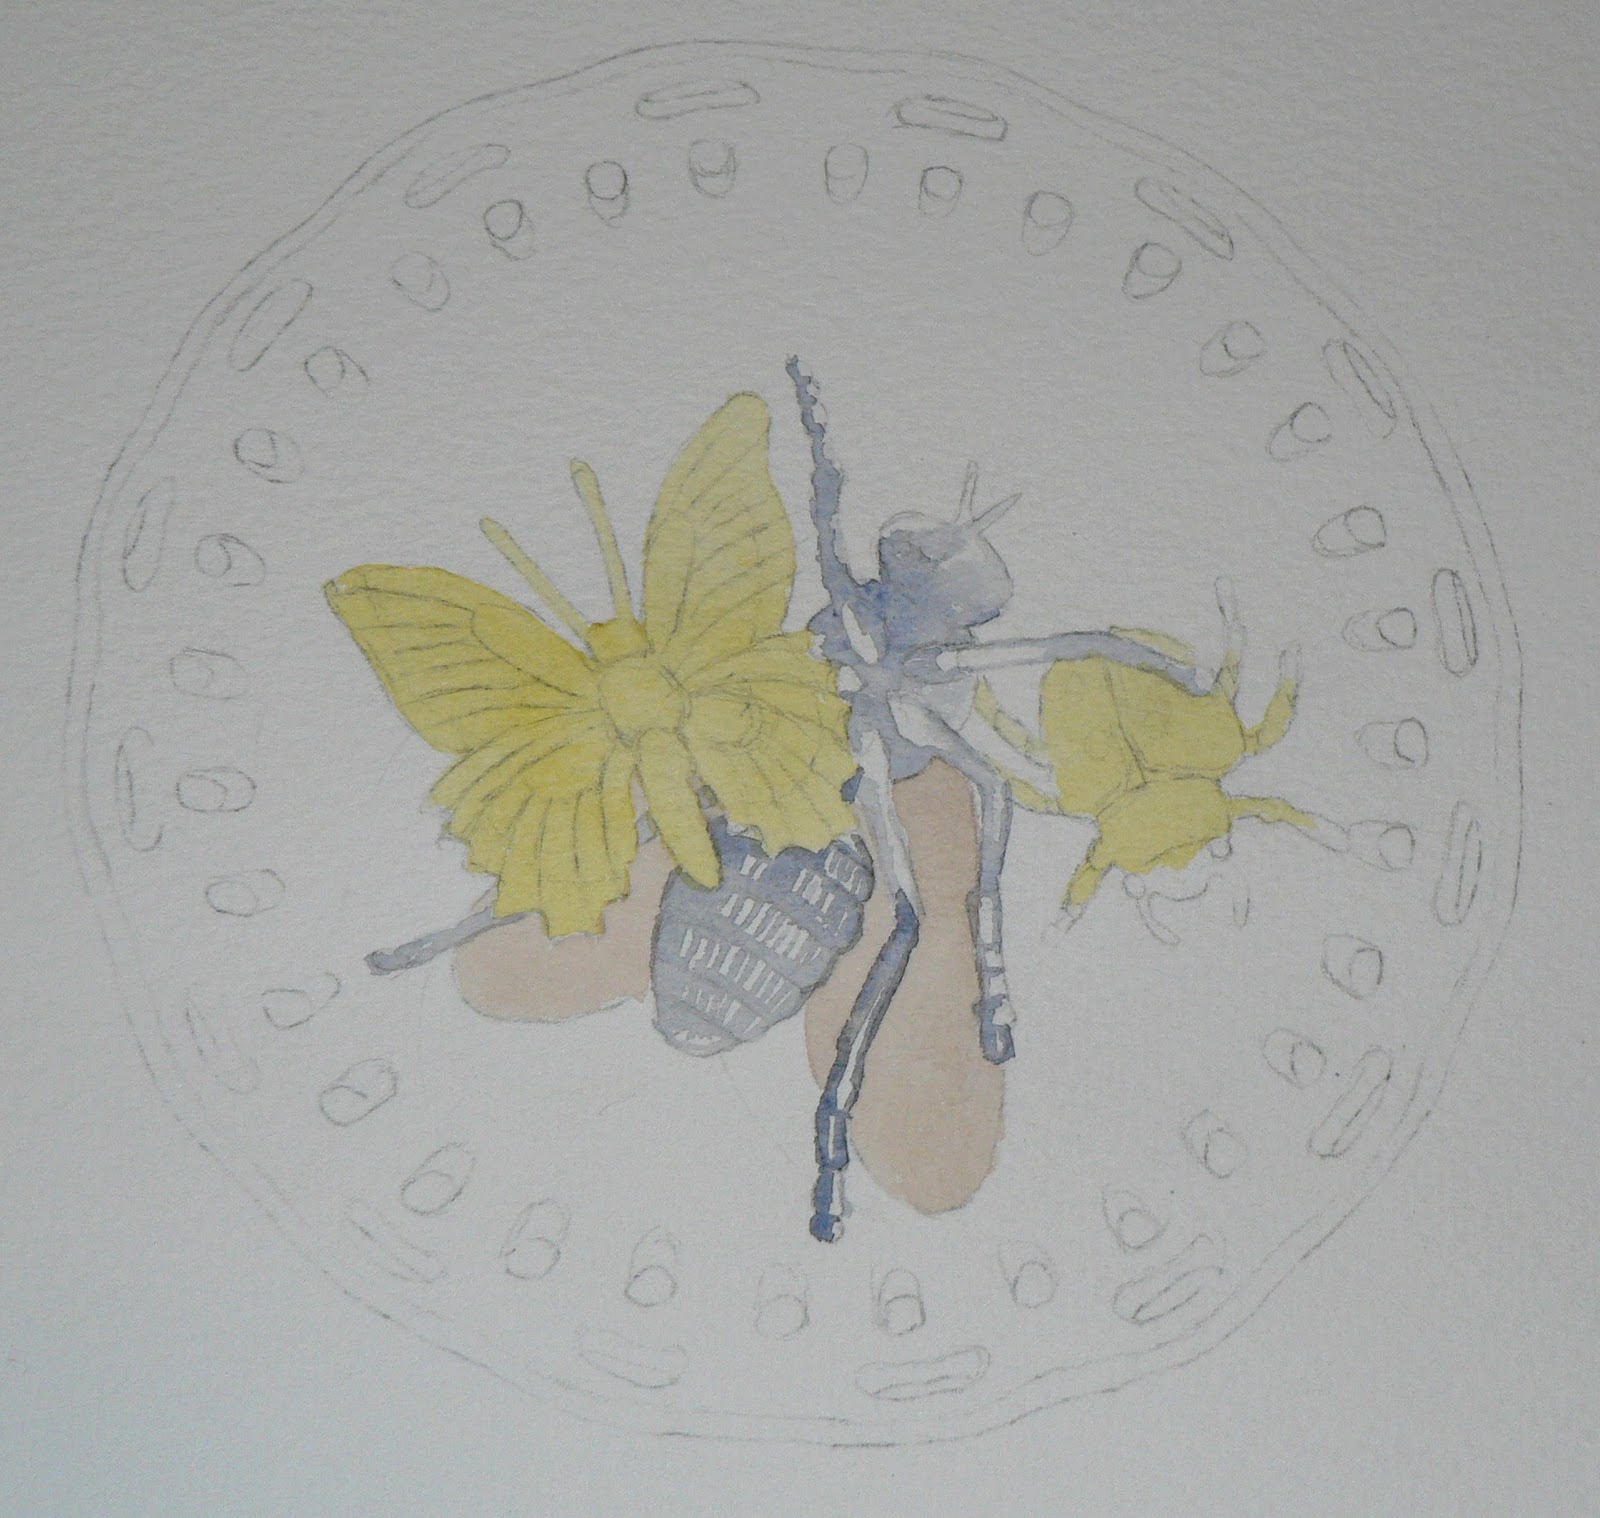
In these photos, I am starting to put in the washes for the bowl - very nerve racking, as I am quite happy with how the bugs have turned out, and don't want to mess up at this stage!


In a perfect world, I would have used masking fluid on the bugs and on all the little openings in the bowl, laid over a perfect wash, removed the masking fluid and then painted the bugs at the end - a bit late now.  So the wash is a bitty affair as I try to get around all of the details.  I have never had much success with masking fluid on watercolour paper, I find it tears the surface a bit - pity, because it is such a great idea.  If anyone can tell me what I am doing wrong with the stuff, I would love to know!


I have a terrible habit of leaving the backgrounds until the end, and getting myself into all sorts of trouble - don't do what I have done - paint from the back to the front, it's good advice!


That said, I quite like the backruns in the wash, and truthfully, am over the moon that the painting is working at all!


The legs of the ladybird have bled a bit into the background - the fault of the gum arabic, I think.  They will need to be touched up at the end.  The gum arabic has given the paint a wonderful sheen - I love it - quite unlike the surface of a watercolour painting - I am planning on glazing a thin layer over the whole painting at the end.


Can't wait to see how it all turns out! (See the finished work here.)

Saturday, September 11, 2010

Step-by-Step Watercolour Painting - Part 3


This is Part 3 of the series showing my step-by-step approach to a watercolour painting. 


In Part 1, I explained how I transfer the image onto the paper, and in Part 2, I started to layer the watercolour paint on in thin, transparent washes.

In Figure 14 and Figure 15, I have started to build up more layers of paint to get a rich, transparent colour. I am mixing the paint with gum arabic, which is an experiment, but I am pleased with how the gum arabic is giving the paint a gloss.  It is making the paint more difficult to control as it is sitting on top of the paper, rather than soaking in.  As each layer of wash goes on, it mixes slightly with the one underneath, so I do have to be gentle with the brush so that the colours don't go muddy.

What I like about it, though, is that I can move some of the paint after it has dried, which is not always possible with watercolour.  The highlights on the ladybird have been created by lifting off a bit of the colour.  I have also been able to move some of the dark on the legs and body of the fly, to smooth out the highlights.  

I like to be able to lift out with watercolour, it gives me freedom to make mistakes and fix them up later.  Lifting out is easier with a paper that has a lot of size (the glue stuff they put on the surface of the paper to control its absorbency), but watercolour paper does not have a lot of size, so I am pleased to see that the gum arabic is giving me the same result.

Figure 14

Figure 15
I left the butterfly to last out of these three bugs, because I don't really like it - I have painted it before - in oils, and it is quite textured and difficult.  I do still have to layer more colour on the wings of the fly, and do a bit of tweaking here and there on all three before they will be finished.  I have not left the highlights completely white, unfortunately and cannot lift out any more paint in those areas, so it seems that I may have to use a bit of white paint (horror of horrors - not traditional!!) in a few tiny spots - I will leave that decision to the very end.


I have yet to tackle the bowl and background, but am feeling more confident that I may be able to pull it off.  Here's hoping.


Stay tuned for the next instalment.

Thursday, September 9, 2010

Step-by-Step Watercolour Painting - Part 2

This is the Part 2 of my watercolour painting process.  In Part 1, I showed how to transfer an image from a photo onto the watercolour paper and gave my Top Tips for Tracing.  Here I lay out my equipment and start painting in thin transparent washes.


Figure 7
Figure 7 I have used a piece of prestik (blue-tac) to mark my place on the photo as I draw from it - all those little holes in the bowl look the same and I can lose my place without the marker.  I learned this tip from a botanical painter.  Move your marker as you go along.

Figure 8
Figure 8 Here I have placed the tracing and the finished drawing side-by-side.  From this you can see that I add a lot of details after I have finished transferring the image from the tracing paper.  The tracing is an aid - not a crutch!

Starting to paint

Figure 9
Figure 9 This is my watercolour painting set up. My brushes, water and palette are placed on my right hand side (I am right handed) so that I don't drip on my work reaching over to get at them.  I experimented with a disposable palette (as seen here under my paintbox), but it is too waxy for watercolour, and I used my paintbox palette instead.  I love a disposable palette for oil painting - so easy to clean up!  


Figure 10
Figure 10 The first washes are on, thin and transparent.  I should really start with the background, but as I am undecided about it, I have started with the insects.  I don't intend to paint the pattern on the plate, nor the blue background behind the plate, but I haven't decided what I am going to do.  I don't recommend this as best practise, but sometimes it is the way a painting goes! I am hopeful that I will decide as I go along, or I may end up in a bit of a mess.  


When laying a small area of wash (thin wet paint) such as I have done here, it is not necessary to wet the area first as the colour can be quickly applied without fiddling too much.  DON'T touch after you have applied the wash until the area is completely dry!


Figure 11
Figure 11 In this photo, you can see that I have put another transparent layer of colours over the first.  I have used a mix of ultramarine and burnt sienna for the dark areas, and in some cases a bit of winsor blue with burnt sienna.  The wing is burnt sienna, and the yellow, new gamboge.


Figure 12
Figure 12 At this point I am starting to use a little gum arabic with the paint - I have never tried it before, but read that it gives the painting a shine.  I can see the shine, but doubt that it will be very effective on the paper I am using - Bokingford 300g - it is far too textured and absorbent.  I like a very smooth drawing paper with good sizing for fine detail watercolour, but couldn't find what I wanted so have settled for something not quite suitable for this painting.  Have to soldier on. 

Figure 13

Figure13 As this photo is taken in daylight, rather than with a flash, the texture of the paper is more visible and the colours are more accurate than the earlier photos - note to self - do painting in daylight so that you can photograph!.  I have added a few more layers of paint - sticking to transparent colours at this stage.  I am happy with how the paintings is going, but can see that I will need to do some work to make the image appear 3 dimensional rather than flat.


More of this step-by-step watercolour painting in Part 3


Painting from Photographs

There is an interesting discussion on painting from photos on Making a Mark, the excellent blog by Katherine Tyrell.  Using photographs to paint from is always controversial 


My own opinion is that a photograph is a tool, often more convenient, quicker and easier than working from life.  I like to work from a photo, I also like to work from the real object.  I am against painting from a photo I have not taken myself (except in the case of a portrait where I may use the sitter's photo.) I don't like the practise of painting from magazine pictures or stock photos, it is unimaginative and often plagiarism.

Thursday, September 2, 2010

Subject Versus Technique

Thanks to Slinkyspiral for the thought provoking comment on my previous post, some interesting points are raised, it's worth a read.


A last word (for now), on the matter of subject versus technique comes from the fascinating watercolour artist, Barbara Nechis who has perfected a dramatic wet-in-wet approach to watercolour painting:
"Content and technique go hand in hand.  One without the other produces either sloppy work or sloppy thought.  Many good ideas have been ruined by limited technical facility, much of it through omission rather than lack of ability.  The viewer of the painting should concentrate on the idea rather than the technique.  The technique must therefore be flawless or it will get in the way of content."


Look out for future posts where I discuss strategies on how to come up with good ideas, and then how to turn these into good paintings.


The Matter of Subject Matter

All paintings have a subject, but all subjects are perhaps not equal.  Subject Matter, ‘what the painting is about’ is one thing that seems to separate artists into: those that ‘are’, and those that ‘wanna-be’.  Artists know what their work is about and can tell you - a ‘wanna-be’ paints a picture.

It’s not how well you paint that makes you an artist, it’s WHAT you paint, and what you communicate through how and what you paint. 

In an earlier post, I have suggested that ‘real’ art (the stuff that makes it into ‘real’ galleries) is not about recording things or showing off technical skills, so what is it about? 

Paintings do have things like landscapes, flowers and people as their subject matter, and other paintings have unrecognisable content - colours, shapes or symbols, that we don’t understand.  Art can be a record of what we see and a technical exercise, but it is also the artist talking to the viewer.  The tone can be conversational and humorous or petty and cantankerous.  Some works are opinionated speeches or tirades.  Some are cries of confusion or frustration.  Some works shout, some whisper.  There are as many kinds of paintings as there are conversations, as many kinds of paintings as there are people.  Paintings are made by people, about things that are of interest to people and for people.  Some art work is full of intense emotion that we can sense even when we don’t know what it is all about.

Many people look at an art work, expecting it to be a beautiful picture, a picture of something that the artist has seen, (or even imagined) almost like a postcard.  I think an art work is like a postcard, but not the picture.  It is like the writing on the back where the person says something, tells something, sends a message, comments or relates an experience.
   
Some paintings are more like a sum than a letter, a place where the artist works out a problem and leaves the working out on the page.  This is confusing to a viewer who expects a picture and can’t figure it out or understand the method.  We usually appreciate this kind of art more when we know about the artist and his ideas.

A work of art is the way an artist tries to express what he is thinking, and/or feeling.  If I believe this, then I need to look for my own meaningful subject matter in my own thoughts and feelings.  (Sketchbooks, notebooks, diaries and journals are good places to find these.)

Some of my 'thoughts and feelings' in my notebooks, sketchbooks and journals.


So, What Can I paint?

When we look for our own subject matter, we need to look at our interests, for things that fascinate us and make us feel something, subjects that we want to talk about. Just as we harp on certain topics in our conversations, or we dwell on things in our thoughts, we will turn to certain subjects and topics to harp on in our paintings.
 
Our own subject matter is not something that we will find outside of ourselves, like a good photograph to copy.  We need to look inside and get to know ourselves and let that out in our paintings.  We have to work hard to understanding ourselves and what we want to say, and then work hard to be able to say it.  This is a long process. It may take a long time to get it right.  We may never get it right, but it should be fun trying.


Quote of the Day
"In a large measure becoming an artist consists of learning to accept yourself, which makes your work personal, and in following your own voice, which makes your work distinctive."
David Bayles and Ted Orland in Art and Fear 

Sunday, August 22, 2010

Two Big Disappointments

When I studied Fine Art at university, I was surprised that we were not taught art techniques. We were not taught much about the materials we were using or how to use them. We weren’t taught the colour wheel, shown colour charts, or even how to paint. We were not required to complete tonal gradation charts, or know the names of the pigments we were using. We did no preparatory sketching, didn't keep sketchbooks or any records of our work. We studied how to make art without any reference to the craft of art making. I can only assume that the omission was deliberate and that knowledge of materials and technique was considered superfluous to the making of important and avante garde work.


Although I graduated with respectable results, I felt quite unprepared for a career as an artist and struggled to make art outside of university. This was a big disappointment, I had a degree in art, but I did not know how to be an artist. I embarked on a post graduate diploma, qualified as a teacher and I taught.


Unfortunately, it’s difficult to teach art with a poor understanding of materials and techniques. I found that most of my students showed no interest in my highbrow philosophy of art making, they wanted to learn to draw and paint in a naturalistic way.


And so began my second art education – I taught myself the craft of art making. I became knowledgeable and skilled in drawing and painting, in materials and techniques and I passed on this knowledge to the best of my ability.


My students learned to make beautiful, realistic paintings; they understood their materials and honed their skills. But their work was superficial, it lacked substance. This was another big disappointment to me, although my students and I knew how to paint well, this did not bring us any closer to being artists.


It has taken me a long time to understand that art is a complex thing. Technique is a means to an end, but certainly not an end in itself.


So, what is it that sets good work apart?


but more importantly,


Can I make a good work of art?